Thursday, October 30, 2008

Some Photos

The initial connections

Added the connections to the IDC breakoff board from the shield. NOTE the tape used to hold the boards together.I had to cut the ends of the IDC connectors to allow them to sit flushly next to one another

First LED test under the buttons (over exposed)
Second LED test under the buttons (under exposed and not focused but you get the idea)

Max Chip and Resistor Network

Many thanks for your order as shown below,


Qty ItemNumber Unit Price Total Price
----------------------------------------------------------
1 MAX7219CNG MAX7219 Ser. Interfaced LED Display 8.50 8.5
1 RN100K 100kohm 9 Resistor Network (10 pins) 0.25 0.25
2 HEADS8 8 Pin .100 Straight Male Headers 0.70 1.4
1 HEADS6 6 Pin .100 Straight Male Headers 0.70 0.7
1 HEADS4 4 Pin .100 Straight Male Headers 0.70 0.7
----------------------------------------------------------
Sub-Total 11.55
Postage 22.00
Total 33.55
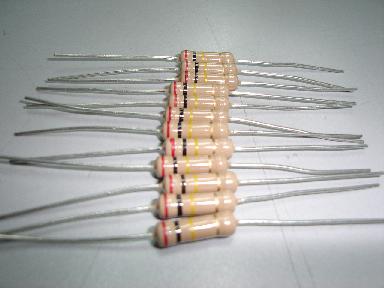
i gave up waiting for the max chip to be shipped as a sample and shelled out the cash and also ordered the remaining parts (some conn headers and the resistor network jaycar couldnt get in). It cost me more than i would have liked but i just want to get my arduinome up and running. I also opted for the premuim shipping as im sick of waiting!!!

Wednesday, October 29, 2008

Wiring

I haven't posted for a while. I have made a lot of progress however, soldering all components to the shield and button boards, wiring the button boards to one another and to the break off pcb for using IDC cables.

During this wiring process I found issues as the wiring diagram I was using was incorrect and out of date. After a discussion over on the monome.org forum the issues were resolved and a new diagram was created by jpsykes, here.

I have no enclosure at the moment due to finances however I bought a $2 tupperware container and hacked it up with a stanley knife.

I am still waiting on my MAX chip and resistor network, once these arrive I will be complete. expect build pictures soon.

Wednesday, October 1, 2008

Arduino Deicimila LED Test


My Arduino Deicimila just arrived today (despite ordering it nearly 2 weeks ago from Sydney) and I ran the LED test code from the website. All seems in working order so now im only waiting on the shield, LEDs and sparkfun order.

Monday, September 29, 2008

LED Resistor Issue SOLVED

So XNDR over on the monome forums cleared it all up for me and i was correct in saying i would be using the 22.6kohm resistor for my LEDs!

Should be receiving all the parts within the next 2 weeks and will hopefully build the unit in a week so hopefully by the end of October i will be finished and the proud owner of my very own Arduinome!

Whats left?

So the LEDs, Arduino, Sparkfun Buttons and PCBs and Diodes are in the mail, what is left to source?
  • 1 x 74HC165n
  • 1 x 74HC164n
  • 1 x 14 pin IC Socket
  • 1 x 16 pin IC Socket
  • 1 x 24 pinIC Socket
  • 3 x 0.1uf ceramic capacitors
  • 1 x 10uf electrolytic capacitor
  • 1 x 10Kohm 10 pin resistor network
I have found all of these things at my local Jaycar for about $10 all up so once the shield arrives I will go pick them all up.

The last component I will need is one single resistor whose value depends on which LEDs you are using. The table below (from the arduino playground website) shows how to find your resistors value.

I have bought 5000mcd LEDs with a forward voltage of between 3.2v-3.6v and a maximum DC forward current of 30Ma however the arduino website suggests limiting to 20mA.

I am going to post a discussion on the monome forum asking about what resistor value i need as mine is 3.2-3.6 however i believe i will need 22.6kohm as i want to limit to 20mA as per the Arduino guidlines and i think it is better to sit on the higher voltage side. This could change after posting on the forum so stay tuned.

Thursday, September 25, 2008

LEDs, Diodes and Sparkfun parts ordered!

This morning I ordered my LEDs here and my Diode Small Signal - 1N4148, Sparkfun button pads and breakout PCBs!

My Arduino should be arriving today or monday and the shields should be here within 2 weeks!

Wednesday, September 17, 2008

LEDs

So I have been trying to decide what LED colour to choose, my preference was purple however these seem very hard to come by, and I found myself looking at different sizes, luminosity and all sorts of stuff I didn't fully understand.

After some online searching I stumbled across this, a brilliant resource on LED information.

When we boil it down, the 'mcd' rating is basically just how bright or 'luminous' the LED is, the sparkfun button pads can fit 5mm LEDs however most DIYers use 3mm as the official monome keypads can only fit 3mm.

While searching and deciding if I wanted red, green, blue or yellow (the most common colour LEDs sold) I found UV LEDs and instantly thought of going to the bowling alley and gazing at my white clothing with fascination.

In conclusion I think I will order some UV LEDs as well as another colour, most likely blue, from this cheap ebay store someone over at monome.org pointed me toward. I am not sure how well the UV LEDs will illuminate the keypad so im going to order another colour just to compare and see which I like better. I will post pictures of the test when I order the LEDs and buttonpads (when sparkfun finally puts more button PCBs online so I don't have to pay shipping twice that is!).

Monday, September 15, 2008

arduino diecimila

I just ordered my arduino diecimila (the brains if you will) rendering me very excited! I managed to find it quite cheap ($50 including postage) within Australia here.

arduino shield, MAX7219CNG+ chip and enclosure

Today I managed to find some guys from the UK doing a group buy of arduino shield PCB's! This is really exciting as this is the only part that is not readily available to the public. I should be receiving it in early October for about $40AUS including postage, an absolute bargain when you consider that having one fabricated as a one off was quoted around the $250AUS mark.

The next thing is that Maxim are shipping me a free 'sample' MAX7219CNG+ chip, so that saves around $20AUS.

Also I sent off an email to XNDR from machinecollective.org enquiring about some different enclosures for my arduinome so hopefully i will have some nice pictures of potential enclosures to post up soon!

part list

Im compiling a list of components i need to complete this project. This list will be updated as time goes by and can be viewed on the right of the blog.

what's your name?

My name is Dan Stork, I live in Brisbane, Australia and study Music Technology at uni.

This blog will serve as archive of my progress through the process of building a monome clone.

At the moment I am thinking I will be using the Arduino Diecimila board as the brains of the operation.

I am using a few blogs and websites as references.
http://bricktable.wordpress.com/30/ - a brilliant reference from the guys who originaly ported the firmware from a 40h to Arduino
http://docs.monome.org/doku.php?id=tech:ports:arduino - monome.org wiki page about the 40h port
http://basementleds.blogspot.com/ - a blog by fellow arduinome builder and monome.org forum member (really great resource for people new to the scene as everything is really clearly explained)

I plan to use the sparkfun button boards and rubber buttons used by most other DIY arduinomers/monomers unless i can find the same product for sale locally.

Keep posted for a full review of the project and part list. I will try and keep it as simple as possible for fellow newcomers to programming, electronics and the world of monome/arduinome.